
Packing a Modern Expedition First Aid Kit with Frontier Practicality

Carrying the Spirit of Lewis and Clark into the Backcountry

When the Corps of Discovery left St. Louis in 1804, its medical supplies traveled in a substantial expedition chest, alongside instruments, medicines, bandages, and tools intended for months far from established care. That chest reflected the realities of the era: limited diagnostics, bulky containers, uncertain supply lines, and a need to improvise with whatever the riverbank or forest could provide. Today, a wilderness traveler can carry a far smaller kit with dramatically greater capability, but the central problem remains familiar. A cut still bleeds, a twisted ankle still stops progress, and cold still drains judgment long before it becomes visibly dangerous.

A modern backcountry first aid kit should therefore follow a frontier principle: every item must earn its place. The goal is not to carry a miniature clinic, but to assemble a compact system for controlling bleeding, protecting wounds, supporting injured joints, maintaining hydration, and preserving body heat until evacuation or professional care becomes possible. As you prepare for a modern expedition, even a small backcountry first aid kit can reflect the same practical resilience that carried earlier explorers through uncertain country, provided it is matched to the route, the group, and the hazards ahead.

Assessing True Frontier Hazards Before Hitting the Trail

The strongest medical kit cannot compensate for poor route planning. Begin by auditing the environment rather than shopping from a generic checklist. Elevation may increase exertion and complicate acclimatization, while weather can shift from sun to rain, wind, or snow within hours. Rough terrain raises the likelihood of falls and ankle injuries, and remote routes increase the time that an injured person may need to remain sheltered. Consider water availability, stream crossings, wildlife, loose rock, exposure, seasonal closures, and the reliability of communication before deciding what belongs in the pack.

Capacity should reflect the expedition rather than the individual ideal. A day hike with two experienced partners requires a different arrangement from a weeklong solo trip in cold, isolated country. The National Park Service emphasizes assessing experience, fitness, elevation tolerance, supplies, communication, weather, and emergency planning before departure. Following the National Park Service guidance to Hike Smart helps turn personal accountability into practical decisions.

  • Match medical supplies to party size, trip duration, and expected evacuation time.
  • Check weather forecasts, land-management alerts, water sources, and route conditions.
  • Leave a detailed itinerary with a trusted person, including a clear overdue procedure.
  • Carry communication and navigation backups rather than relying on a single device.
  • Plan turnaround times and escape routes before fatigue or deteriorating weather narrows your choices.

Field Trauma Care for Cuts, Lacerations, and Soft Tissue Injuries

Bleeding control begins with scene safety and a rapid assessment. Put on gloves if available, identify the source of bleeding, and apply firm, direct pressure with gauze or a clean cloth. A pressure dressing can maintain compression while leaving the responder”s hands available for other tasks. For severe bleeding that does not respond to sustained pressure, hemostatic gauze may help when used according to its instructions. Life-threatening extremity bleeding may require a commercial tourniquet, but this is equipment that should be carried and practiced with before an emergency, not treated as an unfamiliar last-minute gadget.

Once bleeding is controlled, irrigation becomes the main defense against contamination. Wilderness Medical Society guidance supports prompt, vigorous but non-traumatic irrigation, with potable water considered an acceptable field option when sterile saline is unavailable. A large-volume syringe with a splash guard can deliver useful pressure without damaging tissue. Prepare a clean working area, remove visible debris with sterile instruments or clean tweezers, and avoid forcing dirt deeper into the wound. Additives such as harsh antiseptics generally do not replace thorough irrigation and may irritate healing tissue.

  1. Control major bleeding with direct pressure, a pressure dressing, or appropriately used hemostatic gauze.
  2. Expose and assess the injury, looking for embedded objects, loss of function, numbness, or signs of damage to tendons, nerves, or blood vessels.
  3. Irrigate generously with potable or appropriately treated water, using a syringe when practical.
  4. Cover the wound with a sterile or clean non-stick dressing and secure it with gauze, cohesive wrap, or medical tape.
  5. Use closure strips only when the wound is clean, shallow, and its edges come together easily. Seek professional care for deep, gaping, heavily contaminated, bite-related, or function-impairing wounds.

A compact kit should include closure strips, cohesive bandages, sterile gauze, non-stick pads, medical tape, antiseptic ointment, gloves, and a small irrigation syringe. These supplies do not eliminate infection risk, so monitor for increasing redness, warmth, swelling, drainage, fever, worsening pain, or red streaking. A field dressing is a bridge to definitive care, not permission to ignore a wound that needs closure, antibiotics, tetanus protection, or surgical assessment.

Stabilizing Sprains and Fractures Miles from the Trailhead

An injured ankle or knee is among the most common ways a capable hiker becomes unable to continue. Stop early, protect the injured person from additional falls, and assess circulation, sensation, movement, swelling, deformity, and pain. Do not force a joint back into alignment. If a fracture or serious ligament injury is suspected, immobilize the area in the position found unless circulation is threatened or a trained rescuer must make a careful adjustment for evacuation.

Modern moldable aluminum splints offer a major advantage over the timber, bark, and folded-cloth supports available to nineteenth-century expeditions. They are light, compact, and shaped around many body regions. A triangular bandage can create a sling, secure padding, or support an improvised wrap. Trekking poles can become useful structural elements when paired with clothing, sleeping pads, or bandages, although they should not be pressed directly against an injured limb without padding. Splint the joint above and below a suspected fracture, then recheck circulation and sensation regularly.

  • Use padding to protect pressure points and reduce movement.
  • Secure the splint firmly but not so tightly that fingers or toes become cold, pale, blue, numb, or increasingly painful.
  • For a suspected ankle sprain, consider whether the person can bear weight safely; inability to walk normally may require evacuation planning.
  • Elevate an injured limb when practical, while protecting it from cold and avoiding positions that increase pain.
  • Reassess swelling, sensation, skin color, and pain after movement, rest, and every tightening or adjustment.

Conquering Backcountry Dehydration and Environmental Cold Challenges

Dehydration is more than thirst. Falling fluid levels can accelerate fatigue, reduce concentration, worsen headaches, and encourage poor decisions. In strenuous or hot conditions, fluid and electrolyte losses may compound one another, while excessive plain-water intake can create a separate danger through dilution of blood sodium. Carry a dependable treatment method and plan access to water rather than assuming every visible stream is safe. Filters, chemical treatment, ultraviolet devices, and boiling each have strengths and limitations, so a backup method is sensible on longer or more isolated routes.

Cold creates an equally persistent challenge. The body loses heat through radiation, conduction, convection, and evaporation. Contact with wet ground or water accelerates conductive loss, wind strips away warmed air through convection, and damp clothing increases evaporation as it dries. Fatigue, dehydration, inadequate food, and alcohol further weaken the body”s ability to produce or conserve heat. Understanding the principles in the Outdoor Action Guide to Hypothermia and Cold Weather Injuries makes it easier to recognize that shivering, clumsiness, confusion, and unusual behavior are medical warnings, not merely discomfort.

Build environmental protection into the medical system. Chemical heat packs can provide targeted warmth, but they should be wrapped to prevent burns and should not replace dry insulation. A reflective bivy sack or emergency shelter protects against wind and precipitation, while a reliable fire starter creates another layer of resilience when conditions allow a fire. Electrolyte formulations can support fluid replacement during prolonged exertion, and high-energy food supplies the fuel required for heat production. If hypothermia is suspected, shelter the person, replace wet layers, insulate from the ground, provide warm sweet fluids only when fully alert and able to swallow, and arrange evacuation for worsening or severe symptoms.

  • Water containers sized for the route, plus a filter, chemical treatment, or another reliable purification method.
  • Electrolyte packets selected for the expected exertion and climate.
  • Emergency bivy sack, ground insulation, spare insulating layer, and waterproof shell.
  • Chemical heat packs and a protected fire-starting method.
  • High-energy food that can be eaten even when appetite is reduced.

The Ultralight Frontier Checklist

The most effective comparison between historical and modern expedition medicine is not about replacing courage with equipment. It is about reducing the weight required to apply sound judgment. Where an earlier party might have relied on carved wood, linen, animal fat, and limited tinctures, today”s traveler can carry purpose-built materials that weigh less, pack smaller, and perform more consistently. Even so, familiar objects remain valuable because they serve several roles at once.

Need Historical improvisation Modern equivalent
Bleeding control Cloth strips and direct pressure Pressure dressing, gauze, gloves, and hemostatic gauze
Wound cleaning Available river or spring water Irrigation syringe and treated potable water
Joint support Timber, leather, and folded fabric splints Moldable aluminum splint, cohesive wrap, and triangular bandage
Medication Limited expedition remedies Personal prescriptions and carefully selected over-the-counter medicines
Cold defense Blankets, fire, and layered garments Reflective bivy, emergency shelter, heat packs, and fire starter

Weight savings come from choosing items that solve more than one problem. A short roll of duct tape can reinforce gear, secure a splint, patch a shelter, or protect a hot spot on the foot. Safety pins can repair clothing, hold dressings, and support improvised gear fixes. A triangular bandage can become a sling, wrap, securing strap, or head covering. Irrigation syringes are small but valuable because they turn treated water into a practical wound-cleaning tool. Keep medications in labeled, waterproof packaging, and carry only what is appropriate for the group”s medical needs and training.

Adhesive medical patch on an abdomen beside a blue injection pen
Personal medications and routine treatments deserve the same waterproof, clearly labeled preparation as emergency supplies.

Build Your Kit and Venture Forward with Confidence

Equipment is only as effective as the calm judgment behind it. A pressure dressing, splint, or emergency shelter becomes useful when the group recognizes the problem early, communicates clearly, and follows a practiced plan. Consider formal wilderness first aid training, rehearse bleeding control and splinting, and learn how to assess an injured person without creating additional harm. Training also teaches when self-care has reached its limits and evacuation or emergency communication must take priority.

Inspect the kit before every major journey and after every minor one. Replace used, damaged, wet, or expired supplies, refresh medications according to their labels, and adjust the contents for season, terrain, party size, and isolation. The result is a compact expression of frontier practicality: not a promise that trouble will never appear, but a deliberate plan for meeting it. With modern safety science in the pack and the resilience of early explorers in the mindset, the trail ahead becomes a place for discovery prepared with confidence.

Crossing Lemhi Pass: How to Hike the Continental Divide Trail Where History Was Made

Standing at the Brink of Lewis and Clark’s Great Unknown

In August 1805, Meriwether Lewis climbed toward the crest of Lemhi Pass with a practical expectation that the hardest part of the expedition might soon be behind him. He was searching for a navigable waterway that would carry the Corps of Discovery toward the Pacific. Instead, from the high saddle, he saw range after range of mountains stretching westward. The landscape offered no easy river corridor and no gentle passage. It presented another formidable frontier.

Today, Lemhi Pass history remains inseparable from the Indigenous knowledge that made the expedition”s crossing possible. The Shoshone regularly used the route and knew the country far better than the newcomers. Guides led by Pikee Queenah, whom the expedition called Old Toby, helped carry supplies and directed the travelers toward the Lolo Trail. Sacagawea”s recognition by members of the Shoshone community also added a deeply human dimension to this encounter.

At roughly 7,373 feet, Lemhi Pass stands on the Continental Divide near the modern Montana and Idaho boundary. The saddle separates watersheds that ultimately flow toward the Missouri and Columbia river systems, making it both a geographic threshold and a historic one. For modern hikers, the area offers an unusual combination: a relatively accessible high-country destination, a powerful interpretive landscape, and a connection to the broader Continental Divide Trail. The road may bring you close to the monument, but the weather, isolation, and exposed terrain still demand the readiness of a genuine mountain expedition.

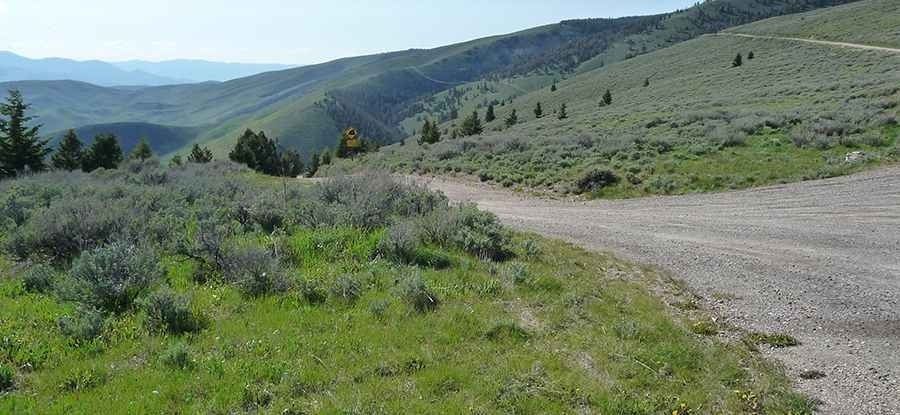
Gravel road winding across sagebrush-covered hills at Lemhi Pass
The pass marks more than a change in elevation: it is where Lewis”s expectations of an easy water route gave way to the scale of the western mountains.

Seasonal Windows and Snowpack Realities Along the Divide

Lemhi Pass is high enough for winter conditions to linger well into the hiking season. Early summer can bring snowdrifts in shaded forest, muddy roads, swollen streams, and saturated meadows. Even when the pass itself appears open, nearby north-facing slopes may retain difficult snow. By midsummer, trails and Forest Service roads are generally more manageable, but afternoon thunderstorms can produce lightning, sudden rain, hail, and sharp temperature drops. Autumn often brings clear views and fewer insects, yet freezing nights, early snow, and rapidly shortening daylight change the character of every outing.

Long-distance hikers treat this stretch of the CDT as a scheduling puzzle rather than a simple summer walk. The broader experience of hiking the CDT shows why snow conditions, storm patterns, wildfire smoke, and route delays can reshape an itinerary even after careful planning. Section hikers should check current forecasts, snow reports, road notices, and fire restrictions before committing to a departure date. Conditions can vary dramatically between an exposed ridge and a shaded drainage only a few miles apart.

Season Likely trail and road conditions Recommended preparation
Late spring and early summer Lingering snow, mud, soft roads, possible drifts, cold nights Traction devices, waterproof layers, gaiters, offline maps, flexible turnaround plans
Peak summer Most reliable access, dry ridges, thunderstorms, mosquitoes, occasional smoke Sun protection, wind layer, extra water capacity, bear storage, lightning awareness
Early to mid-autumn Frozen mornings, possible new snow, shorter days, changing road conditions Warm insulation, gloves, headlamp, emergency shelter, conservative mileage goals

Thru-hikers and section adventurers often build a buffer into their schedules. A delayed road opening, a storm-bound pass, or a difficult blowdown section can consume an entire day. If the goal is to connect Lemhi Pass with a longer CDT segment, plan for conditions rather than dates alone. The best itinerary is one that can absorb a weather day without forcing a dangerous push into darkness or deteriorating terrain.

Navigating the Forest Service Roads to the Trailhead

Approach routes differ depending on which side of the divide supplies the expedition. From Montana, travelers commonly organize logistics around Dillon, Clark Canyon Reservoir, or the Lemhi Pass Road network. From Idaho, Tendoy and Salmon provide useful bases for fuel, food, weather checks, and last-minute supplies. Distances on a map can look modest, but Forest Service roads are slow, winding, and subject to washouts, ruts, fallen trees, and seasonal closures. A route that is straightforward in August may be impassable shortly after heavy rain or an early snowstorm.

A high-clearance vehicle is strongly advisable, particularly for the final approach over rough dirt roads. Four-wheel drive may be useful, but ground clearance, good tires, a full-size spare, and competent driving matter just as much. Do not assume that a large vehicle can turn around everywhere. Narrow sections, exposed edges, and muddy grades can make retreat more difficult than continuing, so check road conditions with the responsible Forest Service office before departure. The National Park Service”s account of the pass is valuable for historical context, but current road status must come from present-day land managers.

  • Download topographic maps and satellite imagery before leaving cell service.
  • Carry a paper map, compass, and written directions as a backup.
  • Fill the fuel tank in Dillon, Salmon, or another suitable town rather than relying on remote availability.
  • Inspect tires, brakes, fluids, lights, and the spare tire before taking the dirt road.
  • Bring a jack and recovery equipment that work on uneven ground.
  • Pack extra food, drinking water, warm clothing, and a basic vehicle emergency kit.
  • Leave an itinerary with a trusted contact, including the access road and expected return time.
  • Check closures, fire restrictions, recent storms, and washout reports on the day of travel.

Cell reception can disappear long before the trail begins. Treat the drive as part of the backcountry commitment, not as a routine transfer between paved roads and a trailhead. If heavy rain begins, reassess early. A vehicle stuck on a remote road can turn a day hike into a search-and-rescue problem, especially when no reliable way exists to call for help.

Step-by-Step Hiking Blueprint from Ridge Saddle to Historic Spring

The exact distance and difficulty of a Lemhi Pass outing depend on the chosen route and whether the objective is the pass monument, a historic spring, a CDT connection, or a longer descent into the surrounding country. The saddle itself provides a compact introduction to the divide, while nearby trails and roads allow hikers to build a half-day or full-day itinerary. Use current maps and local guidance, since alignments, signs, and road conditions can change.

  1. Begin at the pass saddle. Locate the historic monument and orient yourself with a map before starting. Take time to identify the divide, the state boundary area, and the broad drainage patterns visible from the ridge.
  2. Follow the established footpath or signed route downhill. Descending from 7,373 feet may feel easier than climbing, but loose surfaces and uneven ground can punish knees. Keep the route visible and avoid creating unofficial shortcuts through fragile vegetation.
  3. Watch for interpretive features. Monument cairns, signs, and historic references help explain the expedition”s crossing. Remember that the route was not an unknown wilderness to the Shoshone. It was part of an established travel landscape.
  4. Continue toward the historic spring or watershed feature. Water sources can be seasonal, muddy, or affected by livestock and wildlife. Treat all water before drinking, even when it appears clear.
  5. Pause at the basin and retrace the route conservatively. The return climb to the saddle is where elevation and fatigue become obvious. Begin back with enough daylight for careful navigation and allow additional time for weather changes.

The elevation profile is not extreme by western mountain standards, but starting above 7,000 feet changes the effort. Visitors arriving directly from low elevations may notice breathlessness, headaches, unusual fatigue, or slower recovery. Acclimatize with an easy first day, maintain a steady pace, drink regularly, and avoid treating the pass as a test of speed. A short pause to eat before the return climb can prevent a late-day energy collapse.

History is best experienced here at walking pace. Look for the relationship between the trail and the terrain, including the places where a loaded party would have sought water, chosen a grade, or paused to survey the country. Lewis expected a relatively simple crossing toward the Pacific; the view from Lemhi Pass corrected that assumption immediately. Standing among the monument, open slopes, and distant ridges makes that moment understandable in a way no map alone can provide.

Field Skills for Navigating Rugged Lemhi Backcountry

Wind is one of the defining conditions on an exposed divide. Carry a lightweight wind shell even on a warm forecast, along with a warm insulating layer, rain protection, gloves, and a hat. Footwear should match the surface, which may shift from firm trail to mud, talus, roots, or lingering snow. A headlamp, first-aid kit, emergency blanket or bivy, repair supplies, food reserves, and a reliable navigation system belong in every pack, including those carried on short excursions.

  • Carry at least two navigation methods, such as a compass and downloaded map application.
  • Bring more water capacity than the route length appears to require, especially for dry ridge travel.
  • Use a filter or treatment tablets, and have a backup method if cold or silty water affects filtration.
  • Pack high-energy food that remains usable in heat, rain, and cold.
  • Use trekking poles for loose descents, stream crossings, and unstable snow.
  • Carry bear spray where legal and practical, and know how to deploy it before entering bear country.

The Idaho-Montana border country supports black bears and grizzlies, along with elk, deer, mountain goats, and smaller wildlife. Make noise in dense vegetation and near running water, travel in groups when possible, and never approach wildlife for photographs. Store food, scented items, and garbage securely, keeping them away from your sleeping area. If you encounter a bear, do not run. Identify yourself calmly, increase distance, and follow current guidance from local wildlife agencies. Bear spray is a last-resort defensive tool, not a substitute for clean camps and alert travel.

Lemhi Pass can also serve as a gateway to larger CDT plans. Experienced section hikers may connect southward toward Bannock Pass or northward toward Chief Joseph Pass, but those journeys involve more mileage, complex navigation, variable water availability, and potentially rough trail conditions. Accounts from the surrounding CDT include freezing rain, snow-covered slopes, downfall, swamps, dry stretches, and repeated route-finding challenges. Some sections may offer road walks or resupply opportunities, yet remoteness remains the controlling fact.

Before extending the trip, study the full route rather than relying on the pass as a single reference point. Identify bailouts, reliable water, possible campsites, road crossings, and places where a vehicle or support person could reach the trail. Let someone know the intended direction and estimated completion date. The spirit of the historic expedition belongs in the curiosity and endurance of the journey, not in copying its lack of reliable forecasts, communication, or emergency support.

Claim Your Own Frontier Across the Great Ridge

A hike across Lemhi Pass compresses a remarkable story into a landscape that can still feel immense. The monument recalls the Corps of Discovery, but the surrounding terrain also points to the Shoshone people whose knowledge, travel routes, and assistance were essential to the expedition”s progress. The divide remains what it was in 1805: a place where expectations meet the scale of the mountains.

Prepare for the road as carefully as the trail, choose a season with realistic snow and weather margins, and carry enough equipment to remain safe when plans change. Respect wildlife, protect alpine vegetation, treat water, and leave historical features undisturbed. Then step onto the saddle with patience and attention. Lemhi Pass offers more than a scenic stop; it offers a direct encounter with geography, Indigenous travel knowledge, frontier history, and the enduring challenge of moving confidently through wild country.

How to Keep a Field Journal Like Meriwether Lewis (Even on a Weekend Hike)

Rediscover the Trail Through the Eyes of an Explorer

A modern weekend hike can pass in a blur of trail signs, fitness goals, phone notifications, and hurried photographs. Yet a woodland edge may be holding a complete story in plain sight: a plant flowering several days earlier than expected, a change in soil from dry gravel to dark loam, or a thrush calling from a patch of forest that feels otherwise silent. The landscape is constantly offering information, but fast-paced hiking often leaves little time to receive it.

Meriwether Lewis approached travel differently. During the Corps of Discovery expedition, he treated the trail as a living laboratory, recording rivers, terrain, weather, plants, animals, and encounters with unfamiliar environments. The Library of Congress research guide describes the expedition as both a journey across the continent and a major contribution to knowledge of the trans-Mississippi West. Lewis did not simply pass through the country. He measured, compared, described, and returned to his notes repeatedly.

You do not need a scientific commission, a packhorse, or a wilderness route to adopt that discipline. A pocket notebook and five focused minutes can turn a familiar loop into an expedition of discovery. By recording what you see before identifying it, sketching function rather than beauty, and returning to observations over time, you build a personal archive of the places you walk. The goal is not to imitate every nineteenth-century practice, but to borrow its most valuable habit: sustained attention.

The Anatomy of an Expedition Notebook

Historical field books had to survive demanding conditions. Expedition journals were carried through rain, rivers, mud, changing temperatures, and long periods far from replacement supplies. Their compact format made them easier to transport, while protective coverings and careful handling helped preserve observations that might otherwise have disappeared. The surviving record matters because it combines immediate impressions with practical information about routes, habitats, weather, and natural history.

A modern notebook should be chosen for reliability before appearance. Weather-resistant paper is useful in damp forests, while a flexible cover fits comfortably into a pocket or hip belt. A pencil remains one of the most dependable writing tools outdoors because it works when paper is slightly wet and does not leak in a pack. A fine waterproof pen can add darker lines for sketches, but carry a pencil as a backup. When heading out to document the natural world, selecting reliable trail-ready equipment and hiking gear makes all the difference in keeping your notes safe from the elements.

Create a repeatable entry format so that useful details are not forgotten when the trail becomes busy. Leave the first few lines of every entry for basic orientation, then add observations beneath them. A consistent structure also makes it easier to compare the same location across seasons.

  • Date and time: Record when the observation begins and ends.
  • Location: Add a trail name, landmark, coordinates, or a simple description such as “north-facing slope above the creek.”
  • Elevation and conditions: Note elevation when available, cloud cover, wind, temperature estimate, recent rainfall, and ground moisture.
  • Subject: Describe the plant, animal, rock, water feature, or ecological interaction being studied.
  • Evidence and questions: Record what is certain, what is suspected, and what needs to be checked later.

Do not worry about making every page polished. Expedition notes were working documents, not decorative albums. Write quickly, leave space for additions, and use abbreviations that remain understandable. A small symbol system can help: a question mark for an uncertain identification, an arrow for movement or direction, and a star for an observation worth revisiting.

Comparing Historical Field Methods with Modern Citizen Science

Lewis”s botanical work depended on close inspection, description, collection, and comparison. He noted distinctive structures, habitats, and seasonal details, sometimes preserving specimens for later study. Today”s weekend naturalist can pursue the same curiosity without removing anything from the landscape. Photographs, careful measurements, sound recordings, and shared observations provide valuable alternatives that protect living communities.

The historical record must also be read with perspective. Indigenous Nations possessed extensive knowledge of plants, food systems, medicines, seasonal cycles, and land stewardship long before European expeditions arrived. The Academy of Natural Sciences” Botany of Nations exhibition emphasizes these Indigenous relationships with plants and reconsiders the Lewis and Clark story through Native perspectives. A modern field journal should therefore acknowledge local knowledge, respect cultural boundaries, avoid claiming discovery of well-known species or uses, and follow rules governing protected lands.

Field parameter Historical approach Modern hiking alternative
Plant identity Detailed descriptions, specimens, and pressed material Photographs from several angles, sketches, and later guidebook comparison
Location Route notes, landmarks, maps, and directional estimates Coordinates, trail markers, elevation readings, and habitat descriptions
Weather Handwritten observations of wind, clouds, temperature, and precipitation Notebook records paired with a local weather app, while preserving your own impressions
Animal encounters Descriptions of tracks, behavior, range, and visible characteristics Remote observation, sound notes, track measurements, and no-contact photography
Conservation ethics Collection was often part of expedition science Leave-no-trace observation, habitat protection, and respectful engagement with Indigenous knowledge

Citizen science platforms can help you contribute observations, but identification should follow observation rather than replace it. Record the evidence first, then consult a reliable guide or database. This preserves the reasoning process and prevents an app”s suggested label from becoming an unexamined fact.

Mastering the Five-Minute Field Sketch Without Artistic Talent

Scientific sketching is not a test of artistic talent. Its purpose is to make you look carefully enough to notice structure. A quick drawing can reveal that two leaves have different vein patterns, that a seed pod opens along a particular seam, or that a bird”s apparent color changes with light. Even an awkward sketch can preserve information a photograph misses, especially when you add arrows and written notes.

Watercolor palette beside a botanical field sketch on paper
Field sketches turn careful looking into evidence, helping hikers notice structures, patterns, and seasonal changes that quick photographs may overlook.

Start with the largest shape and establish proportion before adding detail. For a leaf, draw the central midrib first, then indicate the outer contour and major veins. For a seed pod, show its overall length and width, then sketch how it attaches to the stem and where it opens. If the subject is small, draw a second enlarged detail beside it. The botanical and natural-history materials gathered by the Library of Congress demonstrate how observation, description, and visual records work together in studying unfamiliar organisms.

Use annotations to explain what the lines cannot. Write “waxy surface,” “veins raised beneath,” “split lengthwise,” or “rough texture like fine sandpaper.” Add a scale reference, such as a fingertip, pencil width, or ruler. Cross-sections are particularly useful. Slice nothing from a living plant, but if a fallen pod, leaf, or twig is already available, draw what the interior reveals. The aim is functional accuracy, not an attractive illustration.

  • Draw the subject in its original position before handling it.
  • Use a single continuous outline when possible instead of repeatedly correcting the contour.
  • Mark light direction and shadow with simple shading.
  • Add arrows to structures such as veins, pores, spines, attachment points, or openings.
  • Write one comparison, such as “smaller than a thumbnail” or “colored like dried straw.”

Set a timer for five minutes. The limit prevents perfectionism and encourages decisive looking. Introductory field-sketching workshops routinely welcome absolute beginners because the method combines science and art as a tool for learning, not as a competition. With repetition, the page becomes a practical record of how a living thing is built and how it changes through the year.

A Four-Step Protocol for Your Next Trail Outing

A good field journal does not require an all-day expedition. A short protocol gives a weekend hike enough structure to produce meaningful observations while leaving plenty of time for movement. Choose one safe stopping place before the hike begins, and avoid stepping off trail or approaching wildlife simply to improve an entry.

  1. Begin with a baseline entry. When you arrive, record the date, time, trail position, coordinates, and approximate elevation. Note the weather as it feels rather than relying only on an app: is the air cool against the skin, is the soil damp beneath the surface, and are clouds moving quickly or sitting still? If you carry a barometer or use an appropriate phone sensor, record the reading and later note whether pressure changed. Add the first sounds you hear, such as running water, traffic, insects, or wind moving through different layers of vegetation.
  2. Choose a sit spot. Spend ten silent minutes studying one specimen or small scene. Select a tree trunk, fallen leaf, lichen patch, rock surface, or distant bird location. Avoid touching the subject unless doing so is safe and permitted. Notice what changes during the interval. A shadow may move across the bark, an insect may emerge, or a background sound may become easier to separate from the rest of the forest. Silence turns the sit spot into an instrument for detecting detail.
  3. Practice descriptive precision. Replace vague words with comparisons and measurements. Instead of writing “green leaf,” try “deep green on top, paler beneath, about two fingers long, with veins arranged like a feather.” Describe texture through familiar references, such as velvet, cracked clay, polished stone, or dry paper. Record dimensions with a ruler when practical, or use body-based estimates when speed matters. Include uncertainty honestly. “Possibly alder, identification pending” is more useful than a confident but unsupported label.
  4. Complete an evening synthesis. At home, review the page while the experience is still fresh. Compare photographs and sketches with regional field guides, museum references, or reputable natural-history resources. Correct an identification in a different color rather than erasing the original thought. List one question for the next outing, such as whether the same plant grows in sunnier soil or whether the bird call returns after rain. This final step turns a single hike into the beginning of a longer investigation.

Weather data, coordinates, and equipment are helpful, but the protocol works without specialized instruments. A pencil, a rough sense of direction, and a willingness to sit quietly are enough. The practice described in modern field-note traditions, including the historical perspective on field notes, treats journaling as a way to reconnect focused attention with the natural world.

Keep safety at the center of every entry. Remain aware of approaching hikers, changing weather, unstable ground, and wildlife behavior. Never let a sketch or measurement distract from navigation. If a plant is in a protected area, on private land, or culturally sensitive, observe without collecting. The best modern expedition leaves the scene undisturbed while bringing home better understanding.

Step Outside and Start Your Own Living Archive

A field journal becomes powerful through accumulation. One page may contain only a cloud note, a rough leaf outline, and an uncertain bird call. Fifty pages can reveal flowering dates, drought effects, migration patterns, changing stream levels, or the return of a species that seemed absent. Over time, familiar trails become living archives, and each visit adds another layer to the story.

Approach the practice with curiosity rather than perfection. Let consistency matter more than elegant handwriting, accurate drawing, or impressive scientific vocabulary. Pack a pocket journal on the very next weekend hike, stop for five quiet minutes, and record one thing that would otherwise have gone unnoticed. That small act follows the spirit of expeditionary observation: travel with readiness, look closely, and allow the trail to teach you where you are.

Lost Power, Found Path: How to Navigate Off-Trail Using River Landmarks and Dead Reckoning

When the Screen Goes Black in the Backcountry

A frozen phone or dead GPS battery can create an instant jolt of uncertainty. One moment, a glowing screen is confirming the route, and the next, the forest seems to close around you. Familiar confidence can disappear quickly when the trail is faint, the weather is changing, and every bend looks like the last. The first response should not be panic. Stop, protect your remaining resources, and shift from digital dependence to deliberate observation.

That shift connects modern hikers with earlier expedition travelers, including the Corps of Discovery as it entered vast territories without satellite feeds, electronic maps, or marked routes. Their instruments were limited, but their attention was disciplined. This guide explains how to turn rivers into handrails, use pace counts and adjusted bearings to estimate movement, and translate contour lines into the ridges, ravines, and watersheds beneath your boots. Dead reckoning is not a primitive substitute for technology. It is a timeless form of freedom that keeps your judgment active when technology inevitably fails.

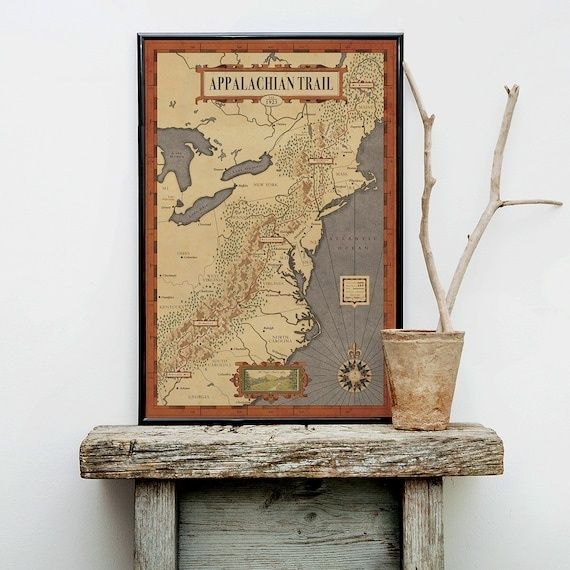
Framed Appalachian Trail map beside a rustic compass-like branch display
Reliable navigation begins with knowing where you started, tracking how you travel, and checking every estimate against the land around you.

The Frontier Playbook of Lewis and Clark

Early explorers rarely knew their exact position at every moment. Instead, they began with a known location, selected a course, estimated travel speed, tracked elapsed time, and compared their expectations with visible landmarks. A river bend, prominent ridge, tributary mouth, or mountain gap could confirm that the expedition was progressing as planned. When the landscape did not match the expectation, the discrepancy became a signal to pause and investigate rather than continue blindly.

This is the essential idea behind dead reckoning. You estimate your current position from a previously known position, a direction of travel, a distance covered, and the time required to cover that distance. No single estimate is perfect. Brush slows movement, steep slopes alter stride, and breaks distort time calculations. Yet a series of careful observations can keep the error manageable. Reliable navigation instruction likewise treats dead reckoning as a form of proactive “staying found,” especially when combined with a map, compass, and environmental awareness. Before heading into remote terrain, study navigation tools and techniques so digital aids remain useful supplements rather than your only plan.

  • Record your starting point, intended direction, and important nearby landmarks.
  • Estimate travel time using a pace appropriate to the terrain, not an ideal trail speed.
  • Write down each major feature you pass, including stream crossings, ridges, saddles, and unusual rock formations.
  • Stop when your observations conflict with the map or your expected timing.
  • Reconstruct the route from the last confirmed position before choosing a new course.

Rivers as Moving Handrails and Baselines

Rivers are among the most useful natural navigation features because they provide both direction and structure. A handrail is a linear feature that you can follow while maintaining a known relationship to your destination. A river, ridgeline, shoreline, or substantial road may serve this purpose. A collecting feature is a feature that gathers you if you drift toward it, such as a valley bottom or stream. A catch line is a boundary that tells you to stop or change direction, such as a major river reached while traveling downhill.

Water generally flows downhill, joining smaller channels into progressively larger streams. On a map, tributaries reveal the shape of the drainage network, while their confluence angles help you compare the paper landscape with the terrain around you. If a narrow tributary enters a larger river from the left, and the main river is flowing toward a distinctive bend, that combination can provide a much stronger position fix than the river alone. Be cautious, however. A small seasonal drainage may be dry, obscured by vegetation, or difficult to distinguish from a shallow depression.

Topographic mapping guidance from the Minnesota watershed delineation guide emphasizes that contour lines connect equal elevations and that water moves downhill across them toward channels. The same principles apply in the field. Identify the direction of flow, note the size and position of tributaries, and use surrounding ridges to determine which drainage basin you occupy. Never treat a river as an invitation to walk directly in its bed. Flooding, unstable banks, cliffs, tangled vegetation, and private or restricted land can turn a navigational aid into a serious hazard.

Drainage feature Navigational utility Field clue
Main river Strong handrail and catch line Continuous channel, broader valley, stronger flow
Tributary Position check within a drainage Smaller channel joining the main stream
Confluence Excellent landmark and route confirmation Two channels meeting at a recognizable angle
Drainage divide Boundary between watersheds Ridge, saddle, or series of high points
Dry wash or seasonal channel Useful but less reliable collecting feature Gully, gravel bed, eroded banks, or sparse vegetation

Calibrating Pace Count and True Bearings

Pace counting turns movement into a measurable estimate. Most navigators count every time the same foot strikes the ground, calling that unit a double pace. Before relying on the method, establish a baseline on level ground. Measure a known distance, such as 100 meters or 100 yards, and walk it at a natural expedition pace while carrying the equipment you normally use. Repeat the exercise several times and record the average. A pace count made in lightweight clothing on a flat path will not transfer perfectly to a steep, brushy hillside, so create separate estimates for different conditions.

A compass also requires careful interpretation. Its needle responds to magnetic north, not true geographic north, and the difference between those directions is magnetic declination, sometimes called variation. Declination changes by location and gradually changes over time. Before plotting a bearing, obtain the current local value from a dependable map or navigation source. The adjustment convention must be followed consistently. A common rule is to add a negative, westerly declination to the compass bearing and subtract a positive, easterly declination. For example, a 180-degree compass bearing with a positive declination of 10.48 degrees becomes 169.52 degrees for the adjusted travel direction. Check the convention printed on your map or compass instructions, because mistakes here can create a steady and dangerous offset. A practical explanation of adjusting for magnetic declination illustrates why the map remains unchanged while the compass direction of travel is corrected.

  1. Mark a known starting point on the map and identify the destination or intermediate landmark.
  2. Determine the map bearing and note the local magnetic declination.
  3. Adjust the compass bearing according to the declination convention used by your map or compass.
  4. Choose a visible object along the bearing, walk to it, and repeat the sighting process.
  5. Count double paces and record elapsed time at meaningful intervals.
  6. Compare the expected distance and timing with actual terrain features before continuing.

Thick brush makes a straight line difficult because it blocks distant views and encourages unconscious wandering. Use point-to-point sighting instead. Set the compass, identify a tree, boulder, or other safe object on the line of travel, walk to it, and sight again. When terrain permits, send one member of a group a short distance ahead while the navigator maintains the bearing, then reunite and repeat. Keep a written pace count, but treat it as an estimate rather than a guarantee. Steep slopes, snow, fatigue, obstacles, and detours all introduce error. If possible, practice these methods on familiar trails where a known map position can confirm how quickly small errors accumulate.

Translating Contour Lines into Tangible Hillsides

A topographic map is a compressed three-dimensional model. Contour lines connect points of equal elevation, and the contour interval tells you how much elevation changes between neighboring lines. Wide spacing usually indicates a gentle slope, while tightly packed lines signal steep ground. Several lines close together on a map may correspond to a demanding climb, a cliff, or a narrow ravine in the field. Reading this pattern before moving helps you predict not only difficulty but also the likely location of water and travel corridors.

Contour lines commonly form V shapes where they cross a stream valley, with the point of the V directed upstream toward higher ground. Follow those shapes to determine the orientation of a tributary and to confirm whether two channels should meet ahead. Ridges produce the opposite visual logic, with high ground extending between drainage systems. Use the map to identify saddles, ridge spurs, and watershed boundaries, then look through the trees for their physical counterparts. A ridge may appear as a subtle rise rather than a dramatic skyline, especially in dense forest. Stop frequently, compare the direction of slope on each side, and ask whether water would drain away from you or toward you. This three-dimensional visualization is more valuable than mechanically tracing lines without understanding the landform.

  • Wide contour spacing suggests easier travel, but check for wetlands, thick vegetation, or hidden cliffs.
  • Tight spacing warns of steep slopes, difficult footing, and possible elevation loss or gain.
  • V-shaped contours usually point upstream along a drainage.
  • Ridges and saddles form high ground separating neighboring watersheds.
  • Streams flow downhill and generally cross contour lines rather than running parallel to them.

Step Confidently into the Wild Without a Screen

When a screen goes dark, navigation becomes an active conversation with the landscape. Instead of waiting for a blue dot to announce your position, you observe water flow, ridge lines, slope angles, confluences, timing, and pace. You form a working hypothesis, test it against the next landmark, and correct course before a small error becomes a major detour. This is the same practical discipline that allowed historic expeditions to move through unfamiliar country with limited information and immense consequences for poor decisions.

Build the skill before an emergency demands it. Practice counting double paces on familiar trails, learn how local declination affects your compass, and carry a paper topographic map protected from weather. Choose a short route with visible drainage and ridge features, then predict what you should encounter before setting out. Check those predictions as you go. The deeper lesson is simple: true outdoor mastery does not come from carrying more sophisticated screens. It comes from understanding the land beneath your boots, preparing for uncertainty, and stepping into the wild with the patient confidence of a well-equipped expedition.

Choosing Your Base Camp: Which Intranet Platform Fits Your Team in 2026?

Setting Up Camp in the Digital Wilderness

When Meriwether Lewis and William Clark set out across uncharted territory, they didn’t simply wander westward and hope for the best. They mapped the terrain, studied the conditions, and chose campsites that gave them access to water, shelter, and strategic positioning for the journey ahead. Selecting an intranet platform in 2026 demands exactly the same kind of deliberate thinking. The market is vast, the vendor promises are loud, and every platform seems to glitter with features designed to dazzle buyers at first glance. Before diving into the technical specifications, many organizations ask how do the leading intranet platforms compare? to understand the current landscape. However, the real challenge isn’t just choosing something impressive — it’s choosing something right for your terrain.

Modern organizations are increasingly distributed, multi-generational, and digitally complex. Desk-based employees collaborate across time zones while frontline workers check schedules from handheld devices. HR managers are racing to improve onboarding experiences while IT leaders are trying to consolidate a sprawling tool stack. Internal communications professionals are hunting for a single home where company culture can thrive without getting buried in noise. For all three audiences, the intranet is meant to be that home — a reliable base camp where every expedition member can gather, regroup, and move forward together. Getting the choice wrong means wasted investment, low adoption, and a workforce that quietly retreats to scattered email threads and messaging apps instead.

A sunlit modern office with a collaborative whiteboard wall and team members at desks.
A successful digital workplace bridges the gap between physical office spaces and virtual collaboration tools to keep diverse teams aligned.

This guide takes a terrain-based approach to intranet selection, moving beyond feature checklists and marketing buzzwords to help your organization ask sharper questions, stress-test the right platforms, and chart a confident rollout path. Just as bringing an expedition mindset indoors can transform how teams approach complex planning challenges, applying that same spirit of methodical discovery to your intranet search will make all the difference between a platform that gets adopted and one that quietly gathers digital dust.

Surveying Your Unique Organizational Terrain

Before requesting a single vendor demo, your team needs to do what any seasoned explorer would do first — survey the land. That means conducting an honest audit of your current technology stack. Which platforms are your employees already using every day? Is your organization deeply embedded in Microsoft 365, or does your team live inside Google Workspace? Do you rely on Salesforce for CRM, ServiceNow for IT ticketing, or Workday for HR functions? The intranet you choose must integrate cleanly with these daily tools, not sit alongside them as yet another isolated destination employees are expected to visit. A platform that forces workers to toggle between a dozen disconnected systems will create friction, not flow.

Beyond technology, take time to identify your organization’s primary communication culture. Some teams are announcement-driven — they need a clear broadcast channel from leadership to the rest of the company. Others are highly collaborative, thriving on discussion threads, peer recognition feeds, and co-created content. Many organizations are a mixture of both, with different departments operating in entirely different rhythms. Your intranet needs to accommodate the real culture you have, not the ideal culture you wish you had. If your field teams primarily receive updates rather than generate content, you need a platform optimized for clear consumption. If your knowledge workers contribute heavily to shared documentation, you need robust content management and search functionality.

Understanding how to prepare before setting out ensures your organization won’t get lost in complex software deployments. Before entering any vendor conversation, gather the following intelligence from within your own organization:

  • Current tool inventory — every platform employees use for communication, file sharing, and HR tasks
  • Adoption failure history — which past digital tools failed and why employees abandoned them
  • Workforce distribution — the breakdown of desk-based, remote, hybrid, and frontline workers
  • Content governance status — who currently owns internal communications and how pages are maintained
  • Top three pain points — the specific friction points that a new intranet must genuinely resolve
  • IT constraints — data residency requirements, SSO needs, and security protocols that are non-negotiable

Armed with this internal map, you walk into vendor conversations as an informed buyer rather than a passive audience for a sales deck. The difference is transformative. You’ll ask harder questions, spot misfits earlier, and shortlist faster.

Charting the Territories of Major Providers

The 2026 intranet landscape is more crowded than ever, but it broadly divides into recognizable territories. On one end sit the enterprise juggernauts — deeply integrated platforms built to operate at scale inside large, complex organizations. These typically offer robust governance tools, advanced permissions structures, multi-language support, and deep analytics. On the other end are agile, purpose-built intranet solutions designed to be fast to deploy, visually modern, and employee-friendly from day one, often targeting mid-sized organizations that want sophistication without the implementation burden of a full enterprise rollout.

When your team reaches a crossroads, the answer lies in matching their native architecture to your daily workflows. A platform that is natively built on Microsoft SharePoint will feel like a natural extension of your digital workplace if your organization already runs Microsoft 365 — but it may feel like a foreign landscape if your team is Google-native. Similarly, standalone intranet platforms often offer superior out-of-the-box experience design and faster time-to-value compared to building on top of a framework like SharePoint, which can require significant customization investment to reach the same usability standard.

Research from the Nielsen Norman Group, which publishes annual studies on intranet usability and design, consistently highlights that employee experience — not feature depth — is the most reliable predictor of long-term intranet adoption. A platform packed with tools that employees never discover or use is no better than a hollow campsite. The best platforms in 2026 are those that combine strong native search functionality, clean mobile interfaces, personalized news feeds, and measurable engagement analytics, regardless of whether they sit inside the Microsoft ecosystem or stand independently.

The following table offers a simplified terrain map of how major intranet categories align with common organizational environments:

Platform Type Best Fit Primary Strength Watch Out For
Microsoft SharePoint / Viva Microsoft 365-heavy enterprises Deep M365 integration, Teams synergy High customization cost, slow UX out of the box
Google Sites / Workspace Intranet Google-native SMBs Familiar interface, fast setup Limited social features, shallow governance
Purpose-built intranets (e.g., Omnia, Simpplr, Staffbase) Mid-to-large orgs wanting fast adoption Superior UX, mobile-first, fast deployment Require solid integration strategy
Open-source platforms Tech-mature teams with developer capacity Full customization control High ongoing maintenance burden

Equipping Teams Beyond the Desk

One of the most important terrain features that buyers routinely underestimate is the frontline worker experience. In industries like retail, manufacturing, logistics, healthcare, and hospitality, the majority of employees never sit at a desk. They work on shop floors, in patient wards, behind service counters, and in warehouses. For these workers, the intranet is not a browser tab they open on a company laptop — it’s a mobile app they check on a personal smartphone, often in short bursts between physical tasks. If the platform isn’t designed with this reality in mind, the headquarters-to-field communication gap will widen rather than close.

Mobile-friendly design in 2026 goes well beyond responsive layouts. The best platforms offer dedicated mobile apps with offline capability, push notifications for urgent updates, simplified content formats optimized for small screens, and single sign-on that doesn’t require employees to remember complex passwords or jump through IT hoops. Low-barrier access is non-negotiable. If a frontline worker needs more than thirty seconds to find the schedule change or safety update they’re looking for, the platform has already failed them. Ease of access isn’t a nice-to-have; it’s the entire value proposition for distributed teams.

Features that successfully bridge the gap between headquarters and the field include:

  • Targeted news feeds — content segmented by role, location, or department so frontline staff see only what’s relevant to them
  • Two-way communication tools — pulse surveys, comment threads, and reaction features that let field workers feel heard, not just informed
  • Visual-first content formats — short video updates, infographics, and image-led posts that convey information quickly without relying on long text
  • Quick links and task shortcuts — one-tap access to shift schedules, payslips, compliance training, or benefit information
  • Manager tools — features that allow team leads to localize communications for their specific groups without needing IT support

Plotting Your Rollout Strategy

Choosing the right platform is only the first stage of the expedition. The rollout itself requires the same disciplined planning that Lewis and Clark applied to their supply chain and route strategy. A hasty deployment — driven by end-of-quarter pressure or vendor timelines — is one of the most common reasons intranet projects fail to achieve meaningful adoption. Employees arrive at a half-built, poorly organized digital environment and quickly form the impression that the tool isn’t worth their time. That impression, once formed, is extraordinarily difficult to reverse.

Rather than experimenting with messy, raw deployments, it pays to follow a proven route instead of guessing to guarantee high user adoption. Established intranet deployment frameworks consistently emphasize the same core principles: involve employee representatives in design decisions before launch, establish a content governance model before going live, and define success metrics from day one so you can measure whether the platform is actually being used and valued.

A phased rollout approach is far more effective than a single big-bang launch. Consider structuring your deployment in the following sequence:

  1. Foundation phase — Configure core navigation, set up SSO, and migrate essential content such as company policies, org charts, and HR forms. Establish the governance framework including page ownership rules and content review cycles.
  2. Pilot phase — Launch to a cross-functional group of 50–200 employees representing different roles, departments, and locations. Collect structured feedback through surveys and usage analytics. Refine content, navigation, and notification settings based on what the pilot reveals.
  3. Broad launch phase — Roll out to the full organization with a visible internal campaign. Identify and empower intranet champions in each department who can answer peer questions and encourage engagement. Celebrate early wins publicly.
  4. Optimization phase — Review analytics monthly for the first six months. Identify underused sections and abandoned pages. Introduce new features progressively rather than overwhelming users at launch.
  5. Governance maturity phase — Establish a quarterly content audit process and an editorial calendar that keeps the intranet fresh, accurate, and worth returning to. Assign ownership clearly so no section goes stale.

Ongoing governance is the unglamorous but essential work that keeps a base camp operational long after the excitement of launch has faded. The organizations that sustain high intranet engagement over years — not just weeks — are those that treat the platform as a living publication rather than a static repository. Assign real owners to every content area. Create a simple process for employees to flag outdated information. Schedule regular town-hall-style virtual events or leadership posts that give employees a reason to return to the platform consistently.

Pitch Your Tent and Start Building Community

The best intranet for your organization is not necessarily the most feature-rich, the most talked-about, or the one your largest industry competitor chose. It’s the platform that fits your existing terrain — one that slots naturally into your technology stack, speaks to your workforce’s daily habits, scales with your communication culture, and gives your IT team confidence rather than headaches. No platform will be a perfect fit from day one; what matters is choosing one with the architecture, flexibility, and vendor partnership to grow alongside you. Start by shortlisting two or three platforms that genuinely match your terrain audit, then run structured pilot evaluations with real employees before committing to a full deployment.

The most successful expeditions in history weren’t completed by those who had the best equipment on paper. They were completed by those who understood their environment deeply, prepared with discipline, and adapted confidently as new terrain revealed itself. Your intranet is the same kind of long-term commitment — a base camp that, when chosen wisely and built thoughtfully, becomes the cultural and operational heartbeat of your entire organization. Start with strong foundations, keep building with your people in mind, and the community you create there will be worth every step of the journey.

Improving health for a modern Lewis and Clark expedition

The original Lewis and Clark expedition took quite a bit of time to plan and if you want to do your own version of this expedition, there are several things that you need to do to prepare.

Improve physical fitness and overall health

It is not an easy trip to make and to do it successfully in the time that you have available, it is a good idea to make sure that you are in the best possible physical condition. This means improving your fitness levels and stamina so that you can keep up with the others on your trip.

If you are a smoker you will find that this might hold you back. It can impact your breathing and your energy levels. It can be helpful to make the switch to nicotine pouches a couple of months before the trip. This will help your body to adapt better and recover from any ongoing use of cigarettes. Take a look at the website for GotPouches for more information on the range of nicotine pouches that are available.

Taking along nicotine pouches from GotPouches will also mean that you won’t have to transport cartons of cigarettes and it is a much more pleasant habit for those around you. You will not smell of cigarettes, which some people can find off-putting.

More exercise

Doing a little training in advance of the trip can also be beneficial. Hiking and canoeing are just two of the activities you should be doing more of, so that when the trip arrives, you will find them much easier to do.

A little research on the original expedition will help to give you an idea of the routes used and the hazards that were faced. Planning ahead will help you to deal with any problems before they arise.

Bringing Your Expeditionist Passion Indoors

If you’re anything like me, the call of the wild is always beckoning. The thrill of exploration, the rush of discovery; it’s a siren song that’s impossible to ignore. But just because we can’t always be out there forging new paths doesn’t mean we have to give up that sense of adventure entirely.

Maps, Globes, and Travel Souvenirs

Incorporate maps and globes into your decor to evoke a sense of wanderlust. Hang vintage maps on the walls or display a stylish globe as a centerpiece. You can even create a gallery wall with maps from your favorite destinations. As for souvenirs, display all you have collected from expeditions around the world. These could include artifacts, textiles, artwork, or even shells. Each item tells a story and adds a unique touch to your decor.

Opt for Good Furniture Covers

Don’t settle for a humdrum living room when you can craft an indoor oasis that captures the intrepid essence of the outdoors. With the right Bemz furniture covers, you can bring that expeditionist spirit into your own home. Durable, versatile, and designed to withstand the rigors of the great outdoors, these covers let you fit your living space with the same rugged functionality you’d demand from your camping gear. Whether you’re looking to protect your sofa from the elements or transform a plain armchair into a proper basecamp-ready seat, Bemz’s selection of furniture covers has you covered

Adventure Gear

There could be no better way to express your passion for expeditions than showcasing your outdoor gear as functional decor. Hang hiking backpacks on hooks, display climbing ropes as wall art, or mount skis or snowshoes on the wall as a statement piece. Not only does this add visual interest, but it also serves as a reminder of past adventures.

Travel Photography

Why can’t you turn your own travel photos into works of art by printing and framing them? Create a gallery wall or scatter framed photos throughout your home to bring back memories of your expeditions and inspire conversations with guests.

Preparing for a Modern-Day Lewis and Clark Expedition

The original journey of Lewis and Clark, back in 1804 would have been a huge undertaking and took a year of preparation. The initial venture challenged them to find a passage from the Missouri River to the Pacific. If you wish to follow in their footsteps, you must build up your stamina and endurance. There will be elements of canoeing, hiking, and navigating rough terrain. Strength and cardiovascular fitness will be necessary. Mental toughness will also play a part.

Developing a Fitness Plan

Before starting your intense fitness regime, you must be dressed appropriately, and a well-fitted sports bra is highly recommended. The seamless sports bra from Aim’n would be ideal, as it offers both support and comfort. Running, cycling and swimming should be included in your endurance training, to ensure you can cope with the demands of the expedition. Bodyweight exercises will build the necessary strength for carrying the equipment.

The original journey was over eight thousand miles, and took 28 months. Rather than recreating the whole expedition, focusing on just one area may be more sensible. This will still require a huge amount of planning but could be a more realistic option.

Exploring Fitness Frontiers

Anybody who enjoys history will be familiar with the Lewis and Clark expedition, which took place during the early 19th century. This epic journey took over 2 years. If you have a taste for adventure, you may be inspired to create your own tribute to this amazing feat. Of course, this isn’t really realistic, but there is nothing to stop you from planning a long-distance hike. This will, of course, require a certain level of fitness.

Be a Fitness Trailblazer

Your fitness quest will undoubtedly start with workouts, and you will need appropriate tops for gym visits and these can be acquired from the well-respected brand of Aim’n. They have a huge range of styles and colours to choose from, to fit all sizes. They would also be ideal to take on your journey, as they have sleeveless vests and long-sleeved hoodies, so you are prepared for all weather.

Your personal expedition may require overnight camping, and the gym tops from Aim’n are comfortable enough to sleep in and add a welcome layer of warmth. Your journey may not make the history books, but if you try hard enough, you will gain an immense amount of satisfaction from the trip!

Follow in the footsteps of Lewis & Clark

History enthusiasts who want to find out more about the Lewis & Clark Expedition should make sure they add the Lewis & Clark Boat House and Museum to their list of places to visit. Located in St Charles, Missouri, this museum is home to all manner of artefacts about the expedition. Staffed by re-enactors, there are regular demonstrations at the museum designed to teach visitors about every aspect of their life and work.

The museum is suitable for people who have a mobility issue or who have undergone recent surgery such as elective cosmetic surgery. Visitors can access the second floor of the building via an elevator, which makes it easier for those who need to be careful after having implants such as the Motiva Ergonomix and need to take it easy.

If you choose Motiva for your augmentation then you are assured of good post-op advice, they will tell you exactly what to expect after surgery and also advise on how much rest you need.

One of the main attractions at the museum is the replica boats, which were painstakingly built by volunteers. However, occasionally the boats are pressed into service for re-enactments and they have appeared on TV shows. Visitors to the museum can also learn more about Native American culture and local wildlife. Why not join one of the guided tours where you can ask questions as you view the exhibits?